Pages

Thursday, December 15, 2011

I'm Teaching My 1st Nutrition Class!!

Whole Foods 4 Life

Lone Tree Yoga & Fitness has asked me to start teaching nutrition & food classes starting in January at their new facility.  I am very excited for this opportunity and hope that I can share my passion for whole foods with all of you!
Check out the link below for the schedule:
The class will be every Friday in January & February from 10-10:30

This class will be for you if you are looking to understand more about nutrition and why we need more whole foods in our diet.  I will be sharing with you what I have learned over the past couple of years about nutrition and how to apply it reasonably within a family setting.  I am not a registered dietician.  This is not a diet plan, it is just an opportunity for me to share the information on what I have learned that has helped me eat better and have greater vitality in life.  I am very passionate about this and hope to share my enthusiasm with you in a way that will help you want to make the changes necessary for your family to have better health too!

If you're not a member at Lone Tree, the class is still very affordable.  If you would like to come up to Mountain Green and do the exercise class with us from 8:50-9:50, then attend my class at 10, I think that would be a great way to start your year off and every Friday might be your best day of the week!  Just buy a punch pass and register for the class and you're set!

Autumn Salad


Autumn Salad with Tangerines, Avocao, & Pumpkin Seeds
Red leaf lettuce or Spring Mix
3 Tangerines, peeled and sections sliced
1/4 red onion, thinly sliced
1 avocado, pilled, peeled, and diced
1/2 c. roasted pumpkin seeds

Dressing:
3 T. red wine vinegar
1 T dijon mustard
1/2 t. ground cumin
1/3-1/2 c. extra virgin olive oil
salt & pepper to taste

Assemble salad with whatever mix of greens you like best.  Top with other ingredients.  To make the dressing, in a small bowl add the vinegar, dijon, cumin, salt and pepper.  Whisk vigorously and slowly add the olive oil while whisking. 

If you are not serving the salad immediately, cover it with a damp kitchen towel and refrigerate until ready to serve.  Always add the avocados right before serving.  Enjoy!


Monday, November 14, 2011

Salmon with Lemon Dill Caper Sauce & Lemon Rice

Even if you're not a fish lover, you will love this sauce on any fish!  Especially over a wild caught piece of salmon or a beautiful white halibut.  My kids will eat any fish with this sauce on it and I hope yours will too.  Tell them the capers are little pickles (if they like pickles) and it goes over great :)  I just got done serving this at a yoga retreat this weekend and all the ladies loved it too!

This lemon rice recipe is one I got from my mother and it is so divine!  To make it a little healthier, I use a brown rice, but the flavor is still wonderful because of the pungent lemon juice!  I can't wait for you to try it.

To prepare, start with the rice first.  Brown rice takes a while to make, so get that started and then move on to make your fish.  Once the fish is in the oven, make your sauce, steam some broccoli, and you'll be ready for a delicious meal!  I take a good large piece of wild caught salmon and put it on a cookie sheet lined with aluminum foil.  Rub the fish with a little olive oil, salt & pepper, and sprinkle with dill.  Then slice a lemon & put thin slices over the top of the fish.  Bake at 400 for 15-20 minutes (or according to package directions if using a frozen fish) until the middle is flaky when touched with a fork.  Cut into pieces and serve with the lemon caper sauce.

Lemon Dill Caper Sauce
1/4 c. butter
1 T. olive oil
1 t. chopped garlic
1/4 c. chicken broth
1/4 c. whipping cream
1/4 c. capers, drained
1/8 t. pepper
1/4 t. dill
1 T. lemon juice, fresh

Sauce butter, olive oil, and garlic for a couple of minutes.  Then add the broth and cream and whisk until it starts to simmer.  Once it's simmering, turn down heat to maintain a small simmer & add the capers, pepper, dill, & fresh lemon juice.  Let simmer 5 minutes to reduce and thicken a little.  If your sauce seems too runny, sprinkle some Wondra (quick mixing flour found in the baking aisle in a container) or flour and whisk until the desired consistency.  I use about 1-2 T. of Wondra to thicken.  It just depends on how thick you want it.
Pour over any fish & enjoy!  The sauce will refrigerate for a week or two.

Lemon Rice
2 c. brown rice
4 c. water
1 T. olive oil
1/2 c. butter
1/4 c. olive oil
1 medium onion, chopped
1/3 c. lemon juice, freshly squeezed
1 t. salt
1 T. chicken bouillon or paste (Better than Bouillon)

Boil water, add rice & oil once it's boiling, then reduce heat, cover and cook for about 45 minutes or until rice is cooked and water is gone.
Meanwhile, chop onion and saute it in 1/2 c. butter & 1/4 c. olive oil.  Once the onion is soft, about 5 minutes, add the lemon juice, salt, and bouillon.  Whisk until it's all blended.  Keep on low heat until rice is ready to mix in.  Once rice is done, toss it with the sauce and it's ready to go!


Oat Cakes

This is a recipe that I absolutely love!  Thanks for finding it Malinda :) They are a mix between a scone and a muffin.  They have a heartier, heavier texture than a muffin, but not so hard like a brick scone!  They are very natural and good for you!  The first day you cook them they are divine, the days after that, they start to dry up, so crumble them up over some greek yogurt & honey or freeze them to use at a later date.

From "Super Natural Every Day: Well-Loved Recipes from My Natural Foods Kitchen" by Heidi Swanson

OAT CAKES
3 cups rolled oats
2 cups spelt flour or whole wheat pastry flour
1/2 teaspoon aluminum-free baking powder
2 teaspoons fine-grain sea salt
1/4 cup flax seeds
3/4 cup chopped walnuts, lightly toasted (see page 219)
1/3 cup extra-virgin coconut oil
1/3 cup unsalted butter
3/4 cup maple syrup
1/2 cup natural cane sugar
2 large eggs, lightly beaten

Preheat the oven to 325°F  with a rack in the top third of the oven. Butter two standard 12-cup muffin pans or line them with papers.

Combine the oats, flour, baking powder, salt, flax seeds, and walnuts in a large mixing bowl.

In a medium saucepan over low heat, combine the coconut oil, butter, maple syrup, and sugar and slowly melt together. Stir just until the butter melts and sugar has dissolved, but don’t let the mixture get too hot. You don’t want it to cook the eggs on contact in the next step.

Pour the coconut oil mixture over the oat mixture. Stir a bit with a fork, add the eggs, and stir again until everything comes together into a wet dough. Spoon the dough into the muffin cups, nearly filling them.

Bake for 15-20 minutes (regular size muffin pan) or 10-15 minutes (mini pans), until the edges of each oatcake are lightly golden. Remove the pan from the oven and let cool for a couple minutes. Then, run a knife around the edges of the cakes and tip them out onto a cooling rack. Serve warm or at room temperature.

Makes 18 oatcakes or 30-40 mini ones

*I prefer to make them in mini muffin tins because they are so dense I would rarely eat an entire muffin.  The mini muffins are perfect snack size.  You have to be very careful not to over bake these or they become very dry. 

Friday, October 14, 2011

Almond Berry Oatmeal

Steel cut oatmeal is one of my favorite breakfasts, next to the smoothies!  There are some mornings, especially in the winter where you just need a nice, hot bowl of oatmeal.  Here is a recipe that will warm your belly & leave you totally satisfied :)  If you haven't tried steel cut oats before, you are missing out.  They make your oatmeal chewy, not mushy.  There is debate whether they are better for you than rolled oats, but not enough solid evidence to know.  I do know they are better for you than quick oatmeal though.  It does take 25-30 minutes to cook, so there is a down side to steel cut oats, but if you have the time, it's worth the wait!  I make a large batch so I have enough to reheat for another day or two.


Steel cut oatmeal (according to package directions)
Agave or brown sugar
Coconut oil (only about 1 tsp. per serving)
Berries (strawberries, blueberries, raspberries, etc...)
Bananas, sliced
Almonds, raw (chopped)
Coconut (optional)
Cinnamon, sprinkled on top

You can add anything you like to oatmeal, obviously, but this is a combination that I love!  Just add your sugar sparingly and let the berries & bananas do the sweetening.  In the winter when berries aren't in season, you can use craisins & apples. The coconut oil will add a good healthy fat for the day and will flavor it just enough to add a little twist!  If it's too thick you can thin it out with some milk or half & half. 

Bon Appetit

Saturday, October 8, 2011

Fish and Flax Oils

This is my kids favorite part of our morning routine!  I know you think I'm kidding, but I'm not! 


We use Barlean's fish oil and flax oil everyday and it is truly the highlight of their morning.  They beg for more because these taste so wonderful!  You can find them at your local health food store usually.  They come in lots of different flavors that all taste delicious.  They are sugar-free and are naturally sweetened!  You should defnitely try them!  Let me tell you why....

We need Omega 3's because they support:
Cardiovascular health
Healthy cholesterol balance
Joint mobility and bone density
Memory & cognitive function
Healthy blood sugar
Healthy mood
Immune health
Eye health
Energy & endurance
Hormonal health
Skin, hair & nail health

Andrew Larson, M.D. & Ivy Larson, ACSM, said "Doctors agree the health benefits associated with Omega-3 essential fat intake are too numerous to count.  Despite those benefits the "fish taste" factor has proven to be our number one problem with patient and client compliance.  Thanks to Omega Swirl those days are gone forever.  Omega Swirl is a genious combination of taste and nutrition your entire family is guaranteed to love."

The american diet is lacking in Omega 3's.  We seem to get a lot of 6's and 9's, but not enough of the 3's, so this is a great way to ensure a good balance.  It has been hard in the past because our kids couldn't take a large capsule, and I hated taking the capsules because they seemed to make me burp fish all day :( yuck!

So, why Barleans Swirls over other types? With the swirls, everyone can take a spoonful and you are getting instant nutrition.  In a clinical study conducted by The Centre for Nutritional Studies, Barleans Omega Swirls were found to be 900% more bio-available than standard fish oil, with the total percentage of oil that reached the blood stream 9 times greater with Omega Swirls than with the same dose and type of fish oil.  Because of their proprietary Swirl technology significantly reduces the size of the fish and flax oil molecules, it allows the oil to more efficiently pass through the intestinal wall and into the bloodstream.  Theoretically, it could take up to 20 standard fish oil gelcaps to equal the amount of Omega-3 from just a two tsp. dose of Omega Swirl!  Amazing!

If you can't afford to take them everyday, at least take the fish oil.  Your cells and your body will thank you!

On Target Living Blog: If I don’t drink milk (cow’s milk) how will I get the calcium I need for healthy bones?

This is a very interesting article. Check it out!

Do you think you need to drink cow’s milk for healthy bones?
Did you know cow’s milk is not the only way to get calcium?

http://blog.ontargetliving.com/2011/08/if-i-dont-drink-milk-cows-milk-how-will.html

Tuesday, October 4, 2011

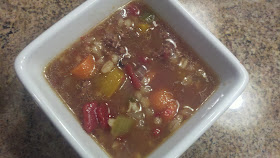
Vegetable Beef Soup

Fall is here and soup season is upon us!!  I love to make soups and this one is a great way to get rid of all the extra vegetables in your refrigerator!!  My kids even like this one and with the pearled barley in it for substance, your husband shouldn't complain that it's not filling enough!! Try it out and see :)

Vegetable Beef Soup

2 T. olive oil
1 large onion, diced
1 lb. organic ground beef (preferably grass fed)
4 stalks celery, diced
6 lg. carrots or 20 baby carrots, diced
1 bell pepper, diced (any color)
1 ½ c. frozen corn
12 c. beef broth
1 ½ c. pearled barley, uncooked
1 can fire roasted tomatoes, diced
½ t. garlic powder
Salt & pepper to taste

Saute onion in olive oil for about 3-5 minutes on med high heat.  Add ground beef and cook until done.  Then add celery, carrots, & the bell pepper and sauté for another 5 minutes on medium high heat.  Add frozen corn and beef broth.  Bring to a boil.  When boiling, add pearled barley and bring to boil again.  Once boiling, reduce heat to medium low and cover pot to cook barley (20-30 minutes).  Once barley seems to be tender, add the can of roasted tomatoes, garlic powder, and salt & pepper to taste. 

This makes a lot of soup, but it freezes well.  Eat it for dinner, save some for leftovers, and freeze the rest!  Or better yet, share with a neighbor on a cold, rainy day!!
This is a great meal for a bread day!  Delicious 12 grain bread with homemade soup!!  It doesn’t get better than that!

Bon Appetit

Monday, September 26, 2011

Veggie Sandwich

The Ultimate Veggie Sandwich

12 Grain Bread (see other blog post for recipe)
Cucumber, sliced
Bell peppers, sliced
Avocados, silced
Tomatos, sliced
Sprouts (I like to home grow mine.  I'll post about that later)
Havarti, swiss, or any cheese of your liking
Roasted red bell pepper hummus

I LOVE this sandwich so much!!  Get two nice slices of bread, spread both slices with hummus, then just layer the veggies high and mighty!  It might look a little too large for your mouth, but don't worry, it'll all work out!!  Feel free to experiment and add whatever it is you like to this sandwich.  The possibilities are endless!

While you're slicing your bell peppers and cucumbers, just add them to your kids after school snack veggie tray.  Or dice up your extra peppers and add them to your morning omelet.  There are so many uses for your extra veggies.  It's worth the time it will take you to cut them up!!

Tip:  Store your extra avocado with the pit inside and wrap tightly with aluminum foil to prevent it from going brown.  Then store it in your fridge.  Use within a couple of days. 

Tip: If you don't make your own bread, when looking for wheat or grain breads in the store, make sure the first ingredient is wheat flour and not enriched flour.  You want as little ingredients as possible, unless it's all seeds and grains.  If you can't understand it, don't buy it!  The more whole ingredients the better.  And if you can buy from a local bakery that grinds their wheat daily, even better!!  (Like Aspen Mills orGreat Harvest Bread Co. )

Thursday, September 1, 2011

PB Balls Gone Healthy

Are you sick of eating packaged protein bars?  This is my new favorite homemade, healthy before or after workout bar (or ball)! It's also a great after school snack!!  It's loaded with protein from the peanut butter. Also, by adding flax meal you are getting some omega 3's, oats are giving you numerous benefits but more importantly fiber and phytochemicals, unsweetened coconut is giving you lots of vitamins and minerals, and if you use local honey, you'll be helping your allergies as well!!  Go ahead, throw anything in these babies!  This is the way I like them for those of you who like to follow a recipe:

PB Protein Balls
1 c. peanut butter, natural (organic)
2 1/2 c. rolled oats or quick oats
1/2 c. flax seed meal
1/2 c. honey
1/2 c. unsweetened coconut
1/2-1 c. chocolate chips
Mix all the ingredients together in a bowl.  It does get quite sticky, so if you'd like to, just get your clean hands in there and mush it all together.  It definitely works best that way!  When the batter looks like the consistency of thick cookie dough, it's ready to roll!  Just pour a little canola oil on your hands so the mixture won't stick to you. Then scoop teaspoon size balls into your hand and roll!  I like to put them on a cookie sheet lined with waxed paper to set in the fridge for about an hour.  After that, just throw them into some baggies and you're good to go :)  You could also freeze them if it makes too many for you and your family to eat in a week or so. 
Bon Appetit

Friday, August 19, 2011

Breakfast Ideas for Kids

A+ Breakfasts for School Day Mornings

By The Circle of Moms Editors - Mar 24, 2011 
No more racing out the door with a Pop-Tart — or, worse, nothing! A well-balanced breakfast provides seriously positive benefits for school-age children, from increased energy to improved concentration. Of course, it’s not easy to mastermind an elaborate nutritious meal on a groggy Tuesday morning, so we’re simplifying your AM meal planning with fast, healthy breakfast ideas that other Circle of Moms members swear by.
1. Fruit Smoothies
Combining fresh or frozen fruit with yogurt or milk in the blender yields a quick breakfast that delivers both solid nutrition and deliciously sweet flavor. As Shellie D. shares: “I usually will give my daughter a smoothie shake with fruit, milk etc.... She loves them. Two seconds in the magic bullet!” She adds “It's so quick and easy!! I usually have one for myself so I just make a little extra for her.” And as Cynthia S. shares, fruit smoothies can easily be made in large batches and saved for another breakfast: “The other thing about smoothies that’s great is if you make extra you can pour the rest into an ice pop mold and then the kids think they're getting an awesome treat for breakfast! I usually use fat-free French vanilla (all natural) yogurt and frozen strawberries.” 
2. Breakfast Sandwiches
If your kids prefer eating en-route to school, a healthy breakfast sandwich is a winning strategy. Christy W. shares: “I'll cook up some turkey sausage patties over the weekend (enough for the following week) then all I have to do is pop them in the microwave for a few seconds while I am toasting whole wheat English muffins and fixing a couple of eggs. Then just make a breakfast sandwich out of it. This so far is one of their favorites and I feel good about it too. Not only does it give them a great start to their day but it’s healthy too!”
3. Yogurt Parfaits
Granola and yogurt with berries,” is the top pick of Samantha S., and she's not alone. Numerous moms suggested this winning combination, which can be easily adjusted with different fruits, yogurt flavors, nuts, and grains to stay interesting. D’Janis R. suggests “Greek yogurt with a couple of spoons of oatmeal or granola cereal, walnuts, and honey drizzled on top,” while Nancy K. recommends “half vanilla yogurt, half lemon yogurt, lots of mixed fresh fruit, blackberries, blueberries, strawberries, bananas, peaches, etc...then top with granola cereal!”
4. Whole Grain or Veggie Pancakes
Pancakes are quick? You bet! As Candy D. shares, advance prep turns pancakes into a one-minute meal on weekday mornings: “You can make them up early and freeze them. Pop in the microwave for 45 seconds and you have a hot healthy breakfast.” To round out the meal, toss a handfull of fresh fruit (think blueberries, raspberries, and bananas) on top, and go easy on the syrup.
Whole wheat isn’t the only healthy pancake variety recommended by moms. Kathleen H. suggests: “For older kids you can make some veggie pancakes (google it) that taste fabulous! I make three different kinds: beet, carrot and butternut squash, and sweet potato. I make large batches of these and freeze them so they’re on hand.”
5. Peanut Butter and Banana on Toast
Misty P. is one of many moms who recommend this nutrituous combination of protein, fruit and whole grains: “We do our favorite peanut butter with sliced bananas on whole wheat toast with milk. The kids love it.” Melissa L. does a similar combo: “I toast a Nutri-Grain waffle, slice it in half and put peanut butter on it. I put the sides together as a sandwich. That and a banana. VERY easy, and healthy too.”
6. Oatmeal or Whole Grain Cereal with Fruit
Although many cereals are loaded with sugar, whole-grain cereals served with fruit and milk are a healthy, quick standby. Beth O. shares: “I give my son multi-grain Cheerios and a fruit (usually kiwi, bananas, clementines, strawberries, blueberries) for breakfast.” Oatmeal is easy and very nourishing (not to mention affordable) Try sprinkling with cinnamon and adding berries, sliced banana or almonds.
7. Scrambles and Omelettes
"Eggs are a great breakfast, lots of protein," share Eva E. While stove cooking may sound ambitious for a rushed morning, with pre-cut veggies (dice them all on Sunday) and pre-shredded cheese in the fridge, cooking should take all of five minutes.
8. Breakfast Burritos
As Heather A. suggests, wrap your scramble in a whole-wheat tortilla for another meal your child can eat on the go: “Scramble eggs, add cheese and onion, mushroom, meat, etc. and put it in a tortilla for a breakfast burrito.”
9. Quiche
My son loves quiche!" Katie S. shares. "Veggies, protein, a little whole grain. It's fantastic.” A healthy quiche (check quiche recipes from Circle of Moms members for ideas) for can be made on Sunday and microwaved by the slice on school mornings.
10. Forget Traditional Breakfast Foods
Got healthy leftovers from last night’s dinner? You don’t have to stick to meals you might see on a restaurant’s breakfast menu. Shares Karen V.: “One thing I learned with all of mine was if they really like something that’s healthy for them even if it’s not traditional ‘breakfast’ food, give it to them! No rule says you can’t give them tuna fish sandwiches in the morning if it’s what they want to eat!"

Thursday, August 18, 2011

Back to School Lunch Ideas


Ready to retire the PB & J sandwich, but stumped by what else to put into your kid’s lunchbox? Try these easy school lunchbox ideas shared by Circle of Moms members – they’re all healthy, simple to make, and will appeal to your kids.

1. Meat and Veggie Wraps & Rolls-Ups

Wraps and roll-ups are recommended by many Circle of Moms members as an easy and enticing alternative to sandwiches. Monique S.'s son likes wraps with sliced turkey, tuna, roast beef, or leftover chicken or steak, while Jacolyn L. suggests veggie wraps: “Spread a thin layer of cream cheese on a wheat tortilla. Layer carrot sticks, slice grape tomatos, fresh spinach and anything else they like.”

2. Hummus,  Pita, & Veggies

"My daughter's number one favorite school snack is hummus and pita bread," Carly C. relays, and Hilary S. agrees: "Pita pocket sandwiches are always a hit (hummus with veggies is always good)." If you're going the dipping route, easy veggie options include strips of bell pepper, baby carrots, grape tomatoes and cucumber rounds.

3. Homemade "Lunchables"

An assortment of whole-grain crackers, low-fat cheeses and low-sodium cold-cuts can offer kids all the fun of building their own meals at school, without sacrificing nutrition. As Amalea S. shares: "With the high sodium and fat in most Lunchable-type foods, I make my own kinds of Lunchables, with cubes of cheese, ham, turkey pepperoni, and different fruits.” Melinda W. takes a similar tactic: “I make homemade 'lunchables' with cut up lunchmeat, cheese and crackers. My kiddos like 'making' their own mini sandwiches.”

4. Peanut Butter & Banana “Sushi” Rolls

Don't be scared by the name this fun lunchbox option is easy! Asya K. explains: "I got this recipe from a Rachel Ray show and my daughter loves it. Take a large piece of whole grain bread and roll it as flat as you can, then spread peanut butter on it, place a whole peeled banana lengthwise across the bread and roll it up and cut like sushi."

5. Frozen Go-gurt

My 7-year-old loves getting a frozen Go-gurt in his lunchbox,” Amanda G. shares, and many Circle of Moms members agree. Simply freeze a box of Go-gurts, toss one in your kid's lunchbox in the morning, and it'll be perfectly thawed by lunchtime!

6. All Kinds of Fruit

Apples are easy, but so are many other fruits! Shaista K. suggests strawberries, diced mango, cantaloupe or pineapple sticks, while Melissa C. recommends raisins, grapes, mandarin oranges, and cherries.

7. Quesadillas

"Try quesadillas!" suggests Jana S. "[Take] some leftover chicken bits, cheddar cheese and salsa, and put in between two tortillas. You can microwave it or put it on a frying pan. My [kids] love it!" Mary G. offers a similar recipe: "Tortilla, folded in half with cheese, grilled, and cut into little sections like a pizza, with a little mild salsa and lite sour cream for dipping." To amp up the healthy factor, opt for whole-wheat tortillas and low-fat or part-skim cheeses.

8. Pasta with Vegetables

Have leftover pasta from last night's dinner? Why not toss it in some tupperware for your kid's lunch? Heather W. suggests "bow-tie pasta with shredded veggies (broccoli, red peppers, zucchini, celery, carrots)" while
Shaye R. recommends “child-size ravioli with steamed peas or other veggies and sprinkled with parmsean cheese or a little honey mustard salad dressing" as well as "pasta or rice with steamed veggies and organic sausage links, cut up.”

9. Edamame

High in protein, fun to eat, and requiring zero prep work, edamame (soy beans) are a great item for school lunches. Karey M. shares: "My 5-year-old loves edamame (soy beans)...Not your usual kid fare, I know." Look for them in the frozen foods aisle.

10. Hard-Boiled Eggs

"[My kids] really like to have boiled eggs in their lunches," shares Kelly D., one of several Circle of Moms members who recommended this as a protein-packed lunch item. To maximize convenience, boil eggs for several days' lunches at once. It's best to pack them with something cold in the lunchbox  perhaps #5 on this list!

Thursday, May 26, 2011

On Target Living Blog: Role of Fruits and Vegetables on Our Health


This book changed my life and way of thinking when it comes to food!  If you are starting to eat healthy or are wanting to start eating healthy, Chris really does a great job of explaining why we should be eating healthy and how our body processes food.  I felt like I was in a health class that was easy to understand and very inspiring.  He is definitely a major nutritionist and eats only the best of everything, but you just have to remember to take it one step at a time, which he encourages anyways.  Very inspiring and motivating!

Here is a link to his blog that is a fun and interesting take on vegetables and fruits!

On Target Living Blog: Role of Fruits and Vegetables on Our Health: "It's been said that God first separated the salt water from the fresh, made dry land, planted a garden, made animals and fish… all before ma..."

Wednesday, May 18, 2011

12 Grain Bread


12-GRAIN BREAD
This is the most fluffy, light, and hearty bread you will ever eat!  We love it so much!! Thanks Michelle :) 

6 c. hot tap water
2 c. 9-grain cracked cereal (uncooked)
1/3 c. millet
1/3 c. sesame seed
1/3 c. flax seed
1 c. raw sunflower seeds
½ c. vital gluten
3 T. yeast

2/3 c. honey or ½ c. Xagave
2/3 c. canola oil
½ c.  powdered lecithin or 2 T. liquid lecithin
2 T. salt
3 T. dough enhancer
Whole wheat flour (approximately 10-12 cups total)

Measure first eight ingredients and 2 cups wheat flour into Bosch bowl.  Mix gently to fold ingredients together.  Let sit ten minutes. 

Mix oil & honey together (and lecithin if using the liquid form).  Add to mixture.  In a small bowl combine 2 more cups of flour, lecithin (powdered), dough enhancer & salt. 

Slowly add those dry ingredients to the dough mixture.  Continue to add whole wheat flour 1 cup at a time until mixture cleans sides of the bowl.  (Approximately 10-12 cups total) Do not add too much flour.  As soon as the side of the bowl looks clean, stop adding flour.  That is the biggest mistake most people make.  The dough is very sticky!  Knead 10 minutes.

Spray counter and hands with canola or olive oil spray to prevent sticking.  Turn dough mixture onto surface and knead to form a ball.  Cut into six pieces and put into 6 loaf pans (or see other combinations below last picture).  Cover loosely with a cloth or put inside grocery bags.  Let rise till about one inch above pans (about 45 min to 1 hr).  Bake at 350 degrees for 30 minutes. If tops get too brown during baking, then cover loosely with a piece of aluminum foil.  If baking rolls or baguettes, they will only need around 20 minutes.  Just watch them and take them out when they're light golden brown.

After they come out of the oven, immediately turn them onto a cooling rack so they don’t go soggy.  If you prefer the crusts to be softer, spray them immediately after coming out of the oven with a water bottle all around the loaf.  The water quickly evaporates, but it softens the crust.  

 This is what it looks like when you have your grains soaking during the first step.

After the first step while my grains are soaking, I get my liquids ready (oil, then honey, then liquid lecithin).  I also get all my dry ingredients mixed in with a cup or two of flour (dough enhancer, salt, and lecithin if powder).

This makes a large batch.  I can get six 8-10 inch loaves or five loaves and 1 pan of rolls or four loaves and three baguettes (I do this combo most because we love eating sandwiches on sub style bread).  The pan is available online or at any cooking store.  It has three wells in it with small holes all over the bottom of it. 

P.S. This bread is very light and fluffy if made with white wheat kernels.  I definitely reccommend grinding your own wheat because after a couple of days you loose 70% of your nutrition from the flour.  If you're just starting, you can surely use store bought flour, but to power pack your bread, try grinding your own.  If you have leftovers, place them in your freezer unless you're going to it within a couple of days, then you could store it in your refrigerator.  I prefer to just grind a ton and freeze it in a large Rubbermaid container. 

Bon Appetit


A good friend of mine from my old Gourmet Club in California has so kindly put this post together of me making the bread, so if you would like to see some videos of it being made, click on this link.  Thanks Nanci!!

http://ocgourmetclub.blogspot.com/2010/11/november-field-trip.html

Monday, May 16, 2011

Tangy Fish Picatta

This has to be my new favorite fish dinners!  My kids love fish and they love lemon sauces, so they gobbled this one up!!  Honestly, they were begging for more.  Even my littlest boy ate it because he thought it was a chicken nugget.  The fish is sliced very thin, so they're really crispy and light.  I tell my boys that the capers are little pickles, so they really go for them!   I hope you enjoy this one as much as my family does.


Fish Picatta
(Serves about 4-6 depending on how much fish you buy)

1- 1 ½ lb. Alaskan salmon or any white fish (Opah, Mahi Mahi, etc..)
½ c. flour
2 eggs
2 c. panko bread crumbs (Japanese bread crumb found on the baking aisle)
¼ c. olive oil
½ c. cooking white wine
¼ c. fresh lemon juice
2 T. shallots, minced
2 t. Dijon mustard
2 T. capers
4 T. cold, unsalted butter, cubed
8 thin lemon slices
1 T. parsley

Slice fish into ¼ inch thin filets.  Place flour in a shallow dish.  Whisk together eggs in another shallow dish.  Place panko crumbs into another small dish.  Lightly salt and pepper the fish.  Dredge fish in the flour on both sides.  Carefully dip the slices into the eggs, then into the panko. 


Place breaded cutlets on a rack set over a baking sheet.  Cover cutlets and chill for 10 minutes.  (I didn’t have time to chill them, so I didn’t do this step and it turned out fine)


Heat ¼ c. olive oil in a large 12 inch non-stick cooking skillet.  Saute cutlets until crisp and golden on both sides, approximately 4 minutes total.  Transfer cutlets to a paper towel lined plate.  (You could always bake them until done for a lighter, healthier version, however, the crispy texture from the olive oil is divine!)

Deglaze skillet with wine and reduce by half, about 3 minutes.  Whisk in lemon juice, shallots, Dijon and capers.  Simmer sauce until reduced about 3 minutes.  Reduce heat to low.  Whisk in butter until melted.  Add lemon slices and parsley.  Season sauce with salt and pepper if needed.  Divide sauce evenly over each serving of salmon.


Serve with any type of rice you would like and a vegetable. 
Bon Appetit


Green Smoothie

This is my new absolute favorite!  I feel so good after drinking it.  If you have been doing smoothies for a while now, you might be ready for a green smoothie!!  This drink will leave you feeling full and full of energy!  I got the basis for it from the Green Smoothie Girl.  She has some amazing recipes and has taught me a lot.  Her website is wonderful if you're interested in more raw, super healthy smoothie recipes.  She is a little extreme for most, but has a lot of good information.


Basic Green Smoothie recipe
(These amounts are for a large Vita-Mix container- you may need to 1/2 the recipe)

3 c. water (you can also substitute 1 c. of juice for 1 c. of the water)
Handfuls of greens (Organic Spinach, Kale, Chard, etc..)
1/4 of a lime or lemon (skin on if you have a Vita-Mix or Blend Tec)
1 c. frozen mixed berries (you can always change it up with pineapple, mango, etc...)
1-2 c. frozen strawberries
1 banana
1-2 T. flax oil or flax seed (great way to get your Omega 3's for the day)
Agave, to taste (about 2-4 T. depending on how much smoothie you're making)
Protein powder (optional) I prefer Hemp or Rice protein powder, vanilla flavored
Greek Yogurt (optional) 


This is what chard looks like.  It is very nutritious and doesn't have a strong flavor.


 Fill your container with the water and lime or lemon.  Then stuff it full of greens.  Mix until well blended.

This is what it looks like after you've blended all your greens.  You can always add more greens if you would like.  It just depends on your taste buds.  The more you drink them, the more greens you'll want to put in them.  To start, just keep it half greens, half fruit. 

Then add your frozen berries, bananas, and the rest of the ingredients.


 Blend until smooth.  It should turn a deep purple color.  If it is not mixing well, add more water to help the ingredients move along.  I find it's easier to drink more when it's not so thick.  You also avoid brain freeze as well. :)  Then just add things according to taste.  If you like creamier smoothies, add more banana and yogurt.  If you like them sweeter, add more berries & agave.  The protein powder is good to add if you're using this as a meal replacement or an after workout drink.  If it ends up being too thick, add more water.  If it's too thin, add more frozen berries.  Just play with it until you find the perfect combination for your family! 

Pour 2-4 cups into a glass or jar and enjoy!!  It is very refreshing and rejuvenating!  I hope you like it as much as I do.  The kids even like this one!  Another good combination is to start with all the greens, then just use blackberries and a lemon instead of a lime and mixed berries.  That is Grandma Steph's favorite!
Green smoothies are only good for two days, so if you have leftovers you can put them in a glass jar and store them in the fridge for two days or freeze them!
Bon Appetit